(I got the idea of what words to put HERE)
Here are the supplies you will need
 |
| sand paper |
 |
| your choice of wood stain |
 |
| wood glue (I used Elmer's wood glue instead of the Gorilla glue because the Elmer's is way easier to clean up.) |
 |
| stencil paint--i used black |
 |
| stencils |
My husband helped me measure the wood and cut it. I used the two short ends from the pieces I cut off the long piece of wood.

then my husband sawed through the wood. We sanded down the rough edges after that.
(Sorry, I'm a dummy and forgot to take pictures of the next steps)
Then I painted on the wood stain. (I used Sedona Red)
Waited 15 minutes, then used a paper towel to wipe off the excess.
I let the finish dry overnight, then added the letters with the stencil paint
***This stencil paint is a miracle worker! I have tried to use stencils before by applying acrylic paint lightly, and it just ran everywhere. This stencil paint is perfect because a tiny bit goes a LONG way. I barely used any paint to get through all the letters. Make sure you hold down the stencil where you are painting so you get a clean line.
Let the letters dry.
(I let them dry overnight but it probably only takes a couple of hours)
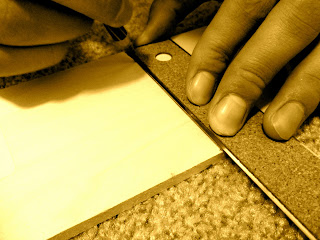
Then I took my sandpaper and gutted the whole thing. I went over the letters multiple times to let them fade. I went over the edges and especially focused on the corners to make it look worn and used.
Here is an example: I concentrated on a few spots to make the original wood come through the stain
Then I used wood glue to glue the entire thing together. This was a little frustrating.
I learned that you only need a little glue, not a lot. If you use too much it slips and slides around never staying where you want it. So use less than you think you will need to.
After the wood glue dried, I added some faux flower stems and a few stems of "Stardust Gyp." That is what the tag says. I found it at Michael's eons ago and thought this would be a good time to use it.
Here are a few shots of the finished product
I have a shelf I am going to paint, put up and put this on. I'm so excited!
Thanks for stopping by!
Huge love,


9 comments:
What a lovely little box! I may ave to make one too! Come by and see my little joint!
I am loving that sweet little box you made! Absolutely darling! Thanks for sharing at Feathered Nest Friday~ hope you will come back and share again soon! :)
Such a wonderful flower box, I love how you put it all together!
hiya i'm maggie and i am visiting from make the world cuter i am following you too , i love how the flower box turned out , very aged and used looking x hope you visit me sometime
xmaggiex
I love it! The color of the stain is perfect.
xo,
Sena
This is so cute! I LOVE your blog! We have a lot of similar interests in crafting! I hope you can stop by my blog someday and take a look around! Would love some new followers! I'm definitely following you!
charming!! it looks perfectly weathered.
This is adorable! You did a really good job on it. Love the lettering! Thanks for sharing at HSH!
Sherry
Oh Hi Karli, nice to 'meet' you - I've been doing some blog cruising, looking for inspiration as my best friend just asked if I could plan a tea party for her daughter's and their friends, and I love your styrofoam ball tutorial so I had to have a little look around the rest of your blog:) Do you know why else I like it... my daughter is crazy about ballet (I never did dance!) so when I saw your header with the black ballerina silhouette I thought it was lovely. All the best, (Aussie girl) Jane:)
Post a Comment