Wednesday, March 16, 2011

Lego Belt Buckle

Hey everyone! I saw this post from Delia Creates and this post from Craft-O-Maniac, and knew that 2 out of 14 nephews would love this so much! I'm sure they all would, I just know for a fact that E and C are Lego fanatics! I couldn't just stop at the Lego pieces though like Delia did (and I think hers are AWESOME).  Those boys used to love Star Wars, then it was Indiana Jones, now it is on to Knights! {I had to text my SIL to see because it seems to change every 3 days! }
Start with these kind of fabric belts. I can't make one like Delia because I can't sew, I wish I knew how though!
These belts are Levi's brand that I got online for a pretty good price. (There are no thrift stores around here unless you count D.I., and I looked there and they didn't have belts their size)
Cut the shape of the Lego piece you want onto foam (mine was the peel and stick kind, but I'm sure any would be fine.)
Then glue the foam to the piece with E-6000 glue... or the piece to the foam. Either works :) 
Use your Handy Dandy E-6000 to glue on another littler piece. When that dried I glued it to the belt. (E and C's favorite colors are green and brown)
BUT CAUTION: Do not put too much glue. When you press down the glue will spread (similar to hot glue) and get everywhere. Learn from my mistake...ha!
After the glue dried overnight I glued the little man to the brown piece and VOILA.
I hope they like it!

Tips:
Let the glue dry completely overnight before the next glueing process. If you don't the pieces slide everywhere

I used the sticky part of the foam to my advantage. When you glue the foam and Lego piece to the belt, use the sticky side to get all 4 corners down onto the metal buckle along with the glue. It works better that way.


{E and C are far away in Nevada. It makes me really sad that I can't see them as much as I would like to. I thought this would be a good present from an auntie(and new uncle :) ) who love them so much!}

{We also got them some Bionicles... hopefully we start a new trend with them! hehehe. Another thing for my bro and SIL to buy!}

FYI: I've been and Aunt since I was 8 years old. So my niece and nephews are like brothers and sister to me {I'm the youngest, my closest sibling is 6 years older than me. The oldest is 16 years older than me.} I love them all sooooo much!{Siblings and niece/nephews}I feel really close to all of them, probably more than a regular aunt/sister. Needless to say I am in L-O-V-E with all of them. I guess its no secret that I love my family a lot! :)

Coming Soon!!!

I've been working on lots of craftiness lately!!! SO... here we go:

1. A special belt buckle that I made for 2 of the cutest nephews in the entire world
2. A "makeshift headbord/not really a headboard" decoration. I've been working really hard on it!
3. How to dye eggs for easter-- with silk ties. Gah! So exciting :)
4. I'm going to Re-Vamp my lil' old lamp that is too dark... it needs lightening up!
5. How to make a cute TuTu for your little girl/niece/granddaughter/sister etc. (I'm finally getting to the dance stuff. I guess since I am a dancer and it's called Dancing Around With Karli...)
SEE! It's too dark. It has been driving me totally bonkers.
... a sneak peek on what's on my nightstand. Kind of boring.. Origins Lotion:  A Perfect World- intensely hydrating body cream with white tea. (a LIFESAVER for dry crackly hands... but too expensive to me to put all over your body haha)
A clock. and more lotion from the Body Shop... apparently I like lotion but I never use it because my hands are always dry.


Hope to see you soon... and bring friends! :0)

xoxo Karli

Monday, March 14, 2011

Birthday Balloon Wreath

I made this for my amazing husband's birthday shindig we had at our house{in January... haha I'm a little late I know}. It was super easy, and only took me about an hour to complete. And I think it will be a tradition: every birthday we will hang the Birthday Wreath!!! Now I just gotta' wait until June!!! {for me of course! :) }

use a Straw Wreath with the plastic still on
8-10 packages of balloons depending on wreath size
3 packages of "greening pins" they are a U shape (Greening pins are really hard to find, but after doing this I found some floral pins that looked just like the greening pins. So just look for the U shape)
Of course there are some bottle caps in the picture, because I was eating them while working on this ha!
I just took 3 or 4 balloons and lumped them together, and stuck a pin over them. I tried to make them go different directions, and not too many of the same color together.

Here is how it looked on our door for his birthday. It was in January and -10 degrees outside. So the balloons froze! It was the weirdest thing! That is why they are so shiny... they are frozen!

Saturday, March 12, 2011

Easter Basket Awesomeness - and a story.

I had a lot of leftover decorative eggs from my Easter wreath, and some ribbon that I didn't use. So I decided to make an Easter Basket!
 The basket I got was 50% off at Michaels... I was jumping up and down! Plus with my coupon I got an additional 40% off of my purchase. The hubby was looking at me like I was a crazy lady when I squealed and jumped up and down watching the $$ drastically reduce! If you can't already tell, I am a pretty happy -go- lucky person, and I get excited easily.


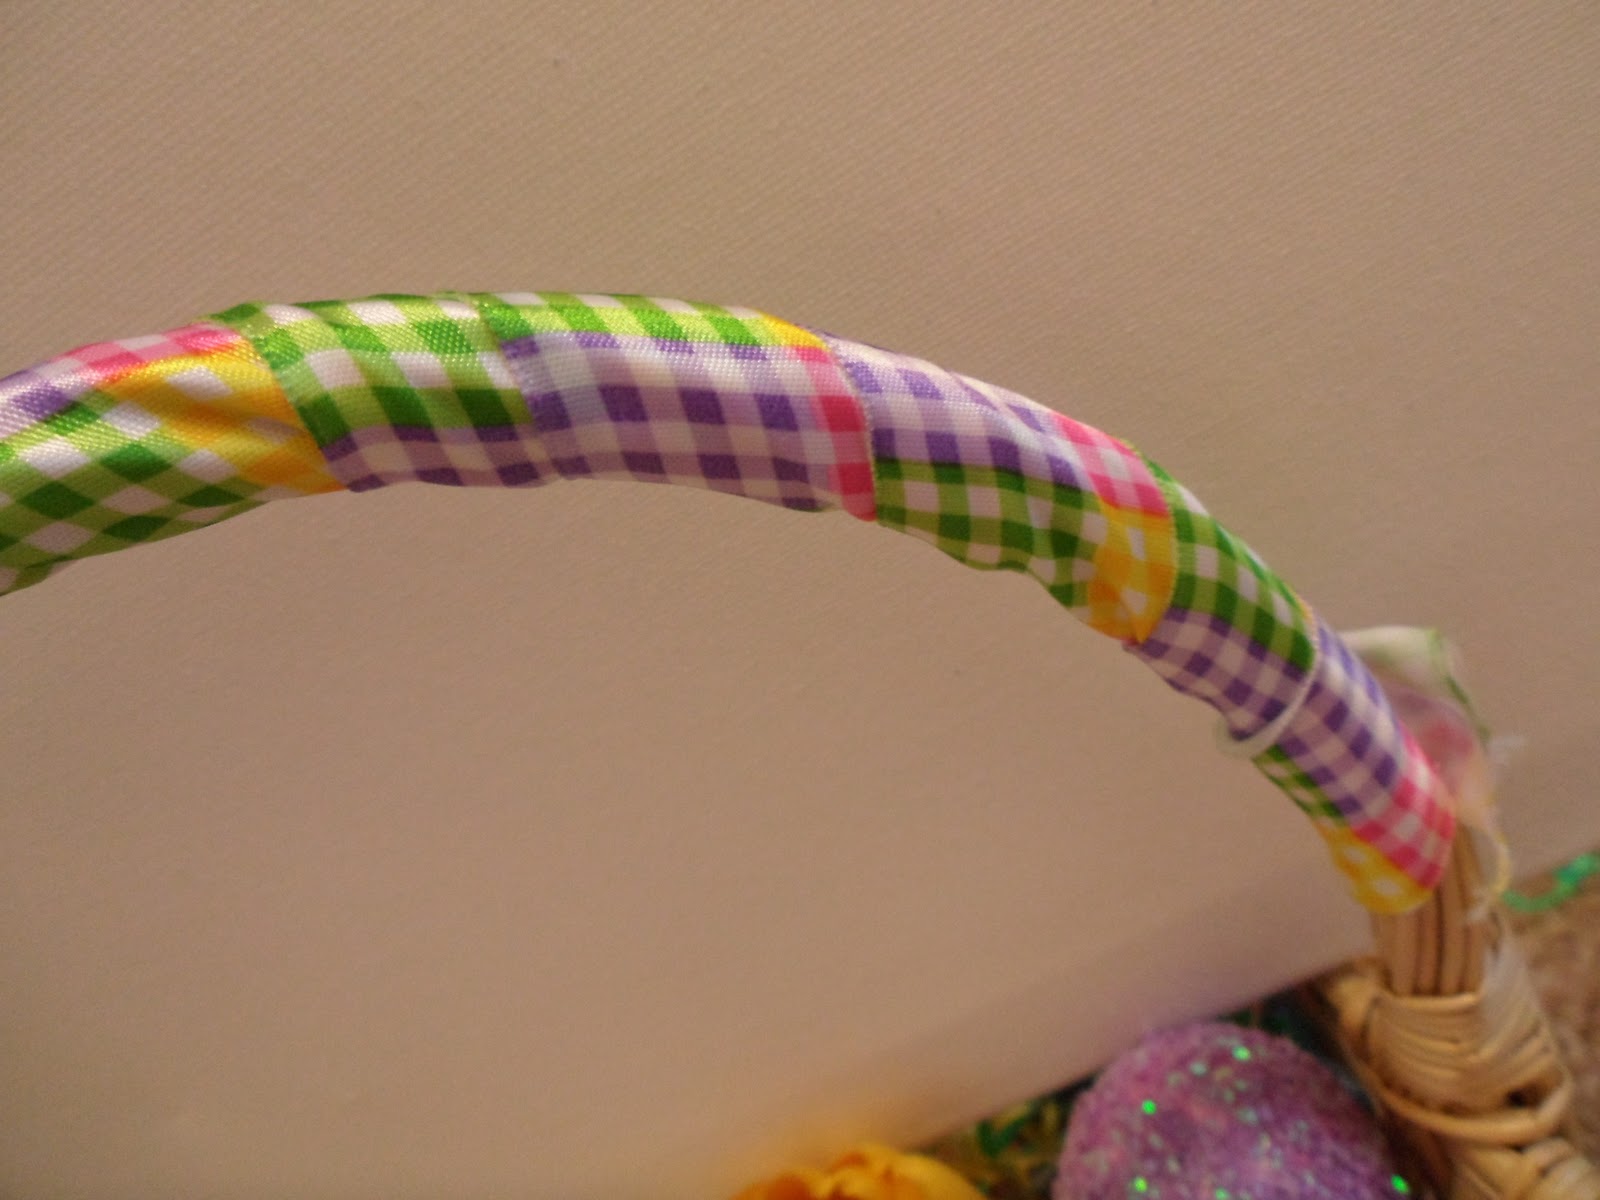
First I wrapped the handle with ribbon

I accidentally found out that if you take out the wire from the wired ribbon,...


It bunches up like this. Ha! I guess you learn something new every day, well at least I do. I glued the bunched up ribbon all the way around the edge of the handle, on top of the wrapped part.

then I started putting my leftover eggs in and some Peep brand stuffed bunnies that I found on clearance at Toys R Us.

added a gerbera daisy, my favorite

and voila, the finished product. The handle totally reminds me of a bonnet, and I think its cute! 

And now, if you would like to keep reading, a little story from my life :) :


 My cutest Grandma in the entire world has this lovely tradition: every Easter {after church} we go to her house and have an Easter Egg Hunt. She lays out in her ginormous yard a BUTT LOAD of candy, and different eggs with money and the amounts vary by age category. The youngest get quarters and the next get about $1 and so on. This year I am excited because 18+ get to hunt for money eggs. I usually only find a $20 {and I usually squeal because I don't normally get gifted $20} but others find $50's and the highest is $100! I've never found one, its really hard. My g-pa is super tricky and finds weird places to put them. But, in total there are 39 of us grandchildren, and almost half are over 18 so yeah, its a wild goose chase! haha! I love my family so much, when we all get together you have to yell just to hear! {oh yeah and the great grandchildren are growing too, it used to be just my brothers and sisters having babies. I have 14 nephews and 1 niece. Now there are 4 more babies from other families. My grandma is going to go broke buying candy! haha!}

Friday, March 11, 2011

Pomme et Poire

This Cute Idea was Inspired by Crafts By Amanda
French wall art is something I am totally obsessed with right now! This little project was a trial and error (like most of mine are) doosey!!! But here is how I did it!


I painted two wooden boards a nutmeg brown acrylic paint


After the paint dried, I applied this crackling medium on top.

When the medium was almost dry I quickly brushed on Antique white. You want to do this LIGHTLY. Don't get too much paint on the brush, because it doesn't crackle as good. And DO NOT go back over it, because it messes the crackle up (that

was the error on my part)
.

                  After the crackle and acrylic paint are completely dry, I cut out the shapes of an apple and pear from different colors of scrapbook paper, then Mod Podged it onto the board. After I added the vinyl letters, I mod podged the entire thing. {I also Don't have a cri-cut or vinyl machine so I had to buy letters at the mall. My parents were with me, and they had no idea why the heck they were standing in line for so long for some "dumb" letters haha.}


these will be on my wall in my kitchen SOON!!!!

Easter Wreath

Ok... I totally hate the Easter wreath I did. So, today I did a total wreath makeover.
I started by TROWING OUT the old gross ribbon, and wrapping the new one around the wreath.
I added some flowers... Gerbera daisies are my FAVORITE
Then I glued the eggs on. But I did find it easier to glue a little piece of Cardstock to it first, then stick it on the wreath. It holds up better.
I added a little loop of ribbon between the flowers to tie it all together!
I learned from my Easter wreath disaster before... that less really IS more! Sheesh! :)

Thursday, March 10, 2011

Yarn Wreaths are Addicting!!!

I originally found the idea for yarn wreaths from a lovely lady named Danielle over at Take Heart. I have to tell you, I L-O-V-E the things she does. I especially love her yarn wreaths, and it is terribly addicting!!

The first one I made was for kicks and giggles... but I loved how it turned out so much that I had to do more!!!

I used her felt flower tutorial and yarn wreath tutorial to create this puppy right here...


Here are the felt flowers... I love making them. It is too easy and they turn out GORGEOUS.
I added some similar colored leaves to give it a little boost... so it wasn't all flowers.

I also used her felt flowers to make a Valentine heart wreath. I got so many compliments on it, and I'm glad because it took me FOREVER! HA! I don't know how many roses I rolled but I used 3 yards of red felt.


Then for a more 'spring-y' look I chose a lavender colored yarn and put a little lace on the side. I got some butterflies from a cute Etsy shop called The Gilded Bee. I added some greenery- I guess you could say- from some things I had bought on sale at Michaels. I really liked how it turned out, and on the first day of Spring... this is going on my door! haha. Danielle did something similar {I searched and searched her blog and couldn't find the post she did on that particular wreath... I'm sorry!!! But, all credit goes to her!!!}


I am most DEFINITELY sure I will be making a lot more of these! I love the texture the yarn gives the wreath, and come on... how cute are the butterflies?


Sending huge love and warm sunny vibes your way! {where I live, we haven't seen the sun all winter long. Today it was sunny, I ran around the apartment like a raving idiot opening all the blinds. Yeah, I loved every minute of it!! haha! That is why almost all the pictures are in the same place. I tried to get as much natural light as I could!}
xoxo Karli